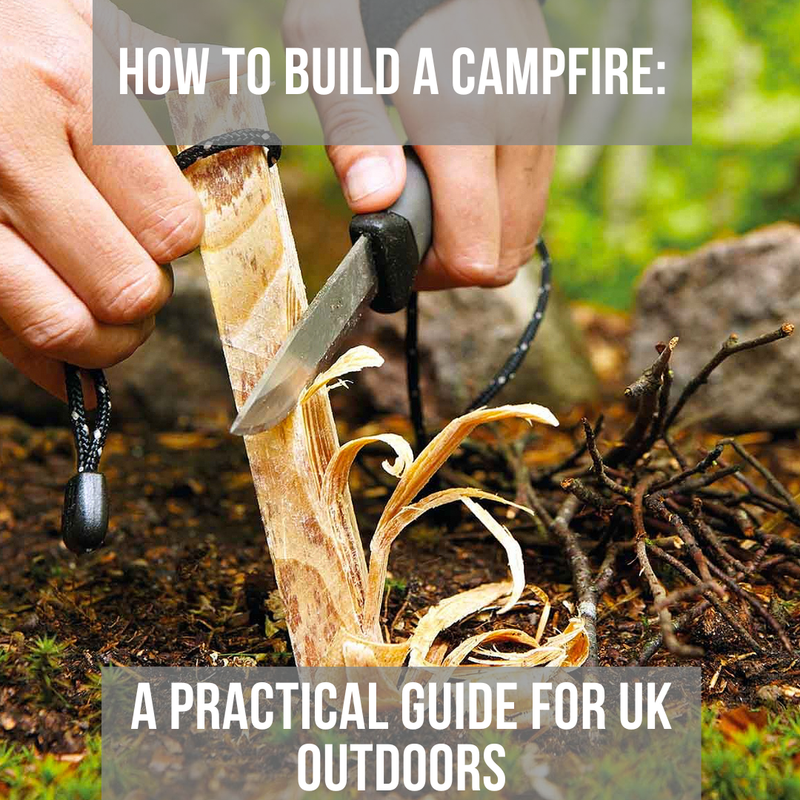
How to Build a Campfire: A Practical Guide for UK Outdoors
Posted by Heinnie Haynes on 17th Feb 2026
Estimated reading time: 12 minutes
Knowing how to build a campfire is one of the most fundamental bushcraft skills you can master. Fire provides warmth, enables cooking, purifies water, offers psychological comfort and can signal for rescue in emergencies. Whether you are wild camping in the Scottish Highlands or practising survival techniques in managed woodland, the ability to reliably create and maintain a fire separates confident outdoors people from those who merely hope for the best.
Why Fire Matters in the Outdoors
Exposure to cold weather poses serious risks in UK wilderness situations, and hypothermia remains a significant hazard, particularly in Scotland's mountains where wet and windy conditions prevail. A well-built fire can raise your core temperature, dry wet clothing and create a comfortable microclimate even in challenging conditions. The psychological boost of sitting beside a fire after a difficult day cannot be overstated.
Beyond warmth, fire transforms your capabilities in the field. Raw food provides limited energy and can harbour pathogens. Fire makes tough proteins digestible and water safe to drink through boiling. Proper outdoor cookware designed for campfire use makes this process efficient and enjoyable.
In genuine emergencies, three fires arranged in a triangle form the international distress signal. Even a single fire produces smoke visible for considerable distances during daylight and light that carries far at night.
What You Will Need
Gathering the right materials before you begin makes the difference between success and frustration. The key principle here is redundancy - carry at least two methods of fire starting and gather far more fuel than you think necessary.
Essential Equipment
Fire Starter: A quality ferrocerium rod provides thousands of reliable sparks in any weather condition. The Light My Fire Swedish Firesteel produces sparks at nearly 3,000°C and works when wet. This should be your primary ignition source.
Knife: A reliable bushcraft knife with a sturdy spine allows you to strike ferrocerium rods and process kindling. Fixed blade designs with full tang construction handle batoning and detailed work equally well.
Backup Tinder: Natural materials work brilliantly when dry, but commercial options like Light My Fire TinderSticks with up to 80% resin content ignite even when damp and provide reliable insurance.
Processing Tools: A hatchet or camp axe for splitting larger wood, plus a head torch for setup in fading light.
Understanding Fuel Categories
Mastering the three categories of fuel transforms your fire building.
Tinder: Fine, dry material that catches sparks or small flames. Think pencil-lead thickness or finer. This includes dry grass, birch bark shavings, dead fern fronds, cotton wool or commercial fire starters.
Kindling: Material ranging from a matchstick to a finger thickness. Dead twigs still attached to trees (standing deadwood) are typically drier than material lying on the ground. Collect more than you think you need.
Fuel Wood: Wrist thickness and larger. This sustains your fire once established. Mix sizes for controllable burn rates. Hardwoods burn longer and hotter. Softwoods ignite more easily but burn faster.
Step 1: Choose Your Location
Good site selection protects both you and the environment. Spend proper time on this decision.
Position your fire at least three metres from your shelter, overhanging branches and any flammable materials. Check overhead clearance as heat rises vertically and can ignite branches several metres above ground level. Avoid areas with deep leaf litter or peat where fire can spread underground and smoulder for days.
Look for natural windbreaks. A banking, boulder or dense vegetation on the windward side improves your fire's performance and reduces spark scatter. However, avoid positioning directly against rock faces as some stone types can explode when heated.
UK Legal Note: In England, Wales and Northern Ireland, you must have landowner permission to light fires except in genuine emergencies. In Scotland, the Land Reform (Scotland) Act 2003 permits fire lighting as part of access rights, provided it is done responsibly as guided by the Scottish Outdoor Access Code. The Code advises using a stove where possible and never lighting fires during prolonged dry periods, in forests, on peaty ground or near buildings. Many woodland areas have designated fire pits. Always check local regulations and conditions.
Choose mineral soil over organic matter when possible. Clear an area roughly one metre in diameter down to bare earth, removing leaves, twigs and duff that could smoulder and spread.
Step 2: Gather Your Materials
Before striking a single spark, gather all materials you will need. Running off to find more kindling while your tinder burns out is a common beginner mistake.
The Pile Principle
Collect at least three times more material than you think necessary. Fire consumes fuel faster than most people expect, especially in cold or windy conditions. Sort your materials into distinct piles by size:
- Tinder, two generous handfuls minimum
- Fine kindling, matchstick thickness, two armfuls
- Medium kindling, pencil to finger thickness, two armfuls
- Fuel wood, wrist thickness and larger, as much as you need for your intended duration
Finding Dry Material
Standing deadwood (dead branches still attached to trees) is typically drier than fallen material, which has absorbed ground moisture. Look for branches that snap cleanly rather than bending. The inner wood of larger pieces often remains dry even after rain.
Process your kindling by splitting larger pieces to expose dry inner wood. Use your knife to create feather sticks from dry softwood. These thin curls of wood catch flame readily and bridge the gap between tinder and kindling.
Wet Weather Tip: If conditions are wet, look under dense evergreen canopies, in hollow logs, beneath rock overhangs and inside standing dead trees. Resourceful firecraft means finding dry material when everything seems soaked.
Step 3: Prepare Your Tinder Bundle
The tinder bundle is where fire begins. Prepare this carefully before attempting ignition.
Birch Bark contains oils that burn readily even when damp. Collect only from fallen trees or loose bark that has naturally separated. Never strip bark from living trees.
Dry Grass collected from sheltered spots makes excellent tinder. Form it into a loose ball about the size of a grapefruit.
Fatwood (the resinous heartwood from old pine stumps) ignites readily and burns hot. Shave it into fine curls for tinder or use slightly larger pieces as kindling.
For commercial backup, the ESEE Fire Starter Kit features a Misch Metal rod that produces molten particles which burn hotter and longer than standard ferrocerium sparks. The Vargo Ultimate Fire Starter combines a ferrocerium rod with bellows to help nurture sparks into flame.
Create a loose nest shape with your finest, driest materials in the centre. The structure should allow air circulation while concentrating sparks where they can catch. Too tight and the bundle smothers. Too loose and sparks fall through without igniting.
Step 4: Build Your Fire Lay
The arrangement of kindling determines how effectively your initial flame grows into a sustainable fire.
| Method | Best For | Key Advantages |
|---|---|---|
| Teepee | General use, most conditions | Concentrates heat upward, easy to build |
| Log Cabin | Cooking, producing coals | Even heat, stable coal bed for cookware |
| Lean-To | Windy conditions | Shields developing fire from wind |
The Teepee Method (Recommended for Beginners)
As each layer of kindling catches, add progressively larger pieces, maintaining the conical shape. The teepee design naturally directs heat upward and concentrates flames.
The Log Cabin Method (Best for Cooking)
For cooking fires that produce even heat and stable coals, the log cabin works beautifully. Build a small teepee of fine kindling, then surround it with larger pieces laid in alternating directions, like building a miniature log cabin. As the structure burns, it collapses inward, concentrating heat and producing a bed of coals ideal for cooking.
Step 5: Light Your Fire
With materials gathered and your fire lay constructed, you are ready for ignition.
Using a Ferrocerium Rod
Hold your fire starter firmly with the rod close to your tinder bundle. Rather than scraping the rod away from you (which can scatter sparks), hold the striker stationary and pull the rod back through it. This keeps sparks directed precisely at your tinder.
Scrape firmly and quickly. Quality ferrocerium rods produce showers of sparks exceeding 2,500°C. Angle the rod so sparks fall directly onto your finest tinder.
Nurturing the Ember
Once you see a glowing ember, resist the urge to blow hard immediately. Gently breathe onto the ember, increasing airflow gradually as the glow spreads. Too much air too soon can cool the ember or scatter your tinder.
As smoke increases and the ember grows, cup the tinder bundle loosely and blow steadily. You should see the glow spread and intensify. When flames appear, place the bundle carefully under your prepared fire lay and continue adding air from below.
Critical Point: Add fine kindling gradually as flames establish. Rushing this stage is the most common cause of fire failure. Each addition should catch fire before you add more. Work through your size grades systematically, from finest to thickest.
Step 6: Maintain Your Fire
A well-maintained fire requires surprisingly little fuel but regular attention.
Add fuel before you need it. Letting a fire burn down to embers, then adding large wood, often smothers the flames. Maintain a consistent level of flame and add fuel in stages.
Position logs so air can circulate beneath and between them. Stacking wood too tightly restricts airflow and produces smoke rather than a clean flame.
For cooking, let your fire burn down to hot coals. Flames are useful for boiling water quickly, but coals provide the even, controllable heat needed for proper cooking. A complete camping cookware setup with a tripod or grill makes campfire cooking significantly easier.
Weather Adjustments
In rain: Shelter your fire with a tarp positioned well above (two metres minimum) to prevent direct rainfall while allowing smoke to escape. Keep dry fuel under cover nearby.
In wind: Maintain lower flames to reduce spark scatter. Consider building a reflector wall of green logs or stones on the windward side to protect your fire and direct heat toward your shelter.
In cold weather: Build a larger fire and position a reflector behind it to bounce heat toward your sleeping area.
Step 7: Extinguish Properly
Responsible fire management includes thorough extinguishment.
Allow your fire to burn down to ash if possible. Spread the remains and douse thoroughly with water. Stir the ashes and douse again. Feel with the back of your hand (not your palm) for any remaining heat. If you cannot make it cool enough to touch, it is not extinguished.
If water is unavailable, mix mineral soil thoroughly with the ashes, breaking up any remaining embers. Cover completely and check again after several minutes.
Leave No Trace: Scatter cold, dead ashes widely. Replace any cleared ground material. Your fire site should be undetectable to the next visitor.
Common Mistakes to Avoid
Starting too big: Attempting to light large kindling directly rarely works. Begin with your finest materials and build gradually.
Insufficient tinder: Running out of fine material before flames establish kills more fires than any other mistake. Gather abundantly.
Wet materials: Even experienced outdoors people underestimate how moisture affects ignition. Process wood to expose dry cores and carry reliable backup tinder.
Poor site selection: Fires in unsuitable locations are difficult to maintain and can spread unexpectedly. Take time choosing your spot.
Smothering with fuel: Enthusiastic addition of large wood often extinguishes developing fires. Patience and gradual fuel increases produce better results.
Neglecting safety: Keep water or mineral soil nearby for emergency extinguishment. Never leave a fire unattended. Clear the surrounding vegetation properly.

What to Do If Things Go Wrong
If your fire repeatedly fails to catch, stop and reassess. Check your tinder is genuinely dry by testing a small piece separately. Ensure your fire lay allows adequate airflow. Consider whether wind or rain is affecting ignition and adjust your approach accordingly.
If your fire escapes its prepared area, act immediately. Stamp out the small spread with your boots. Cover with mineral soil. Call for help if the situation exceeds your ability to control it safely.
If you cannot get any material to ignite despite repeated attempts, accept the situation and adjust your plans. A cold night without fire is uncomfortable but survivable with proper clothing and shelter. Quality outdoor apparel provides insurance against fire failure.
Complete Your Setup
Fire handling requires complementary gear for safety and utility. Tactical gloves protect hands when handling hot cookware and rough firewood. Proper lighting allows safe fire setup and maintenance in darkness.
For personalised advice on building your complete fire kit, book a free consultation through Heinnie Kit Assist and speak directly with our team about which tools suit your outdoor adventures.
Frequently Asked Questions
Is it legal to light a campfire anywhere in the UK?
What is the best fire starter for wet conditions?
How much firewood do I need for one night?
Can I cook directly over flames?
What should I do if my campfire gets out of control?
Disclaimer
This guide is intended for general educational purposes only. The information provided represents practical advice based on common bushcraft techniques and should not be considered a substitute for professional outdoor training or instruction. Fire lighting carries inherent risks including burns, property damage and environmental harm. Weather conditions, fuel types, site selection and individual experience all affect safety outcomes. Readers are responsible for assessing their own capabilities, obtaining necessary permissions and following local regulations before attempting any techniques described in this guide. Always inform someone of your plans before heading into remote areas. Check local fire risk warnings, carry appropriate safety equipment and know your limits. If conditions deteriorate beyond your skill level, prioritise safety over fire success. Heinnie Haynes provides this content to support the outdoor community but accepts no liability for accidents, injuries, property damage or environmental harm arising from the application of techniques described. When in doubt, seek hands-on instruction from qualified bushcraft instructors before relying on these skills in challenging conditions.
Customer Reviews
"A wide range of products at very competitive prices. The website is very easy to navigate and order from with the bonus of reward points leading to further discounts on your order. Finally the delivery of your order is secure and very fast. Highly recommended."
Andrew David Williams
"Outstanding service as I've come to expect, if you need outdoor living and tools you can't go wrong with Heinnie Haynes. Great products, fantastic prices and made to feel like a valued customer by the team."
Niall Campbell
Why not check out our other great blogs For Gear Recommendations And Outdoor Survival Tips